# Setting up and managing GROWI AI Agent
In GROWI v8.0, the AI integration feature was completely redesigned into the agent-driven GROWI AI Agent. Along with this, you can now choose from multiple LLM providers, and the configuration is consolidated into the "AI Settings" admin screen.
This page explains how an administrator enables GROWI AI Agent and configures providers and models.
WARNING
In v8.0, the legacy OpenAI-based settings (such as environment variables for the former "Knowledge Assistant") have been removed, and there is no automatic migration. With the old settings in place, it will not work after the upgrade, so reconfigure it with the steps below.
# Opening the AI Settings screen
From the left menu of the admin page, open "AI Settings" (/admin/ai).
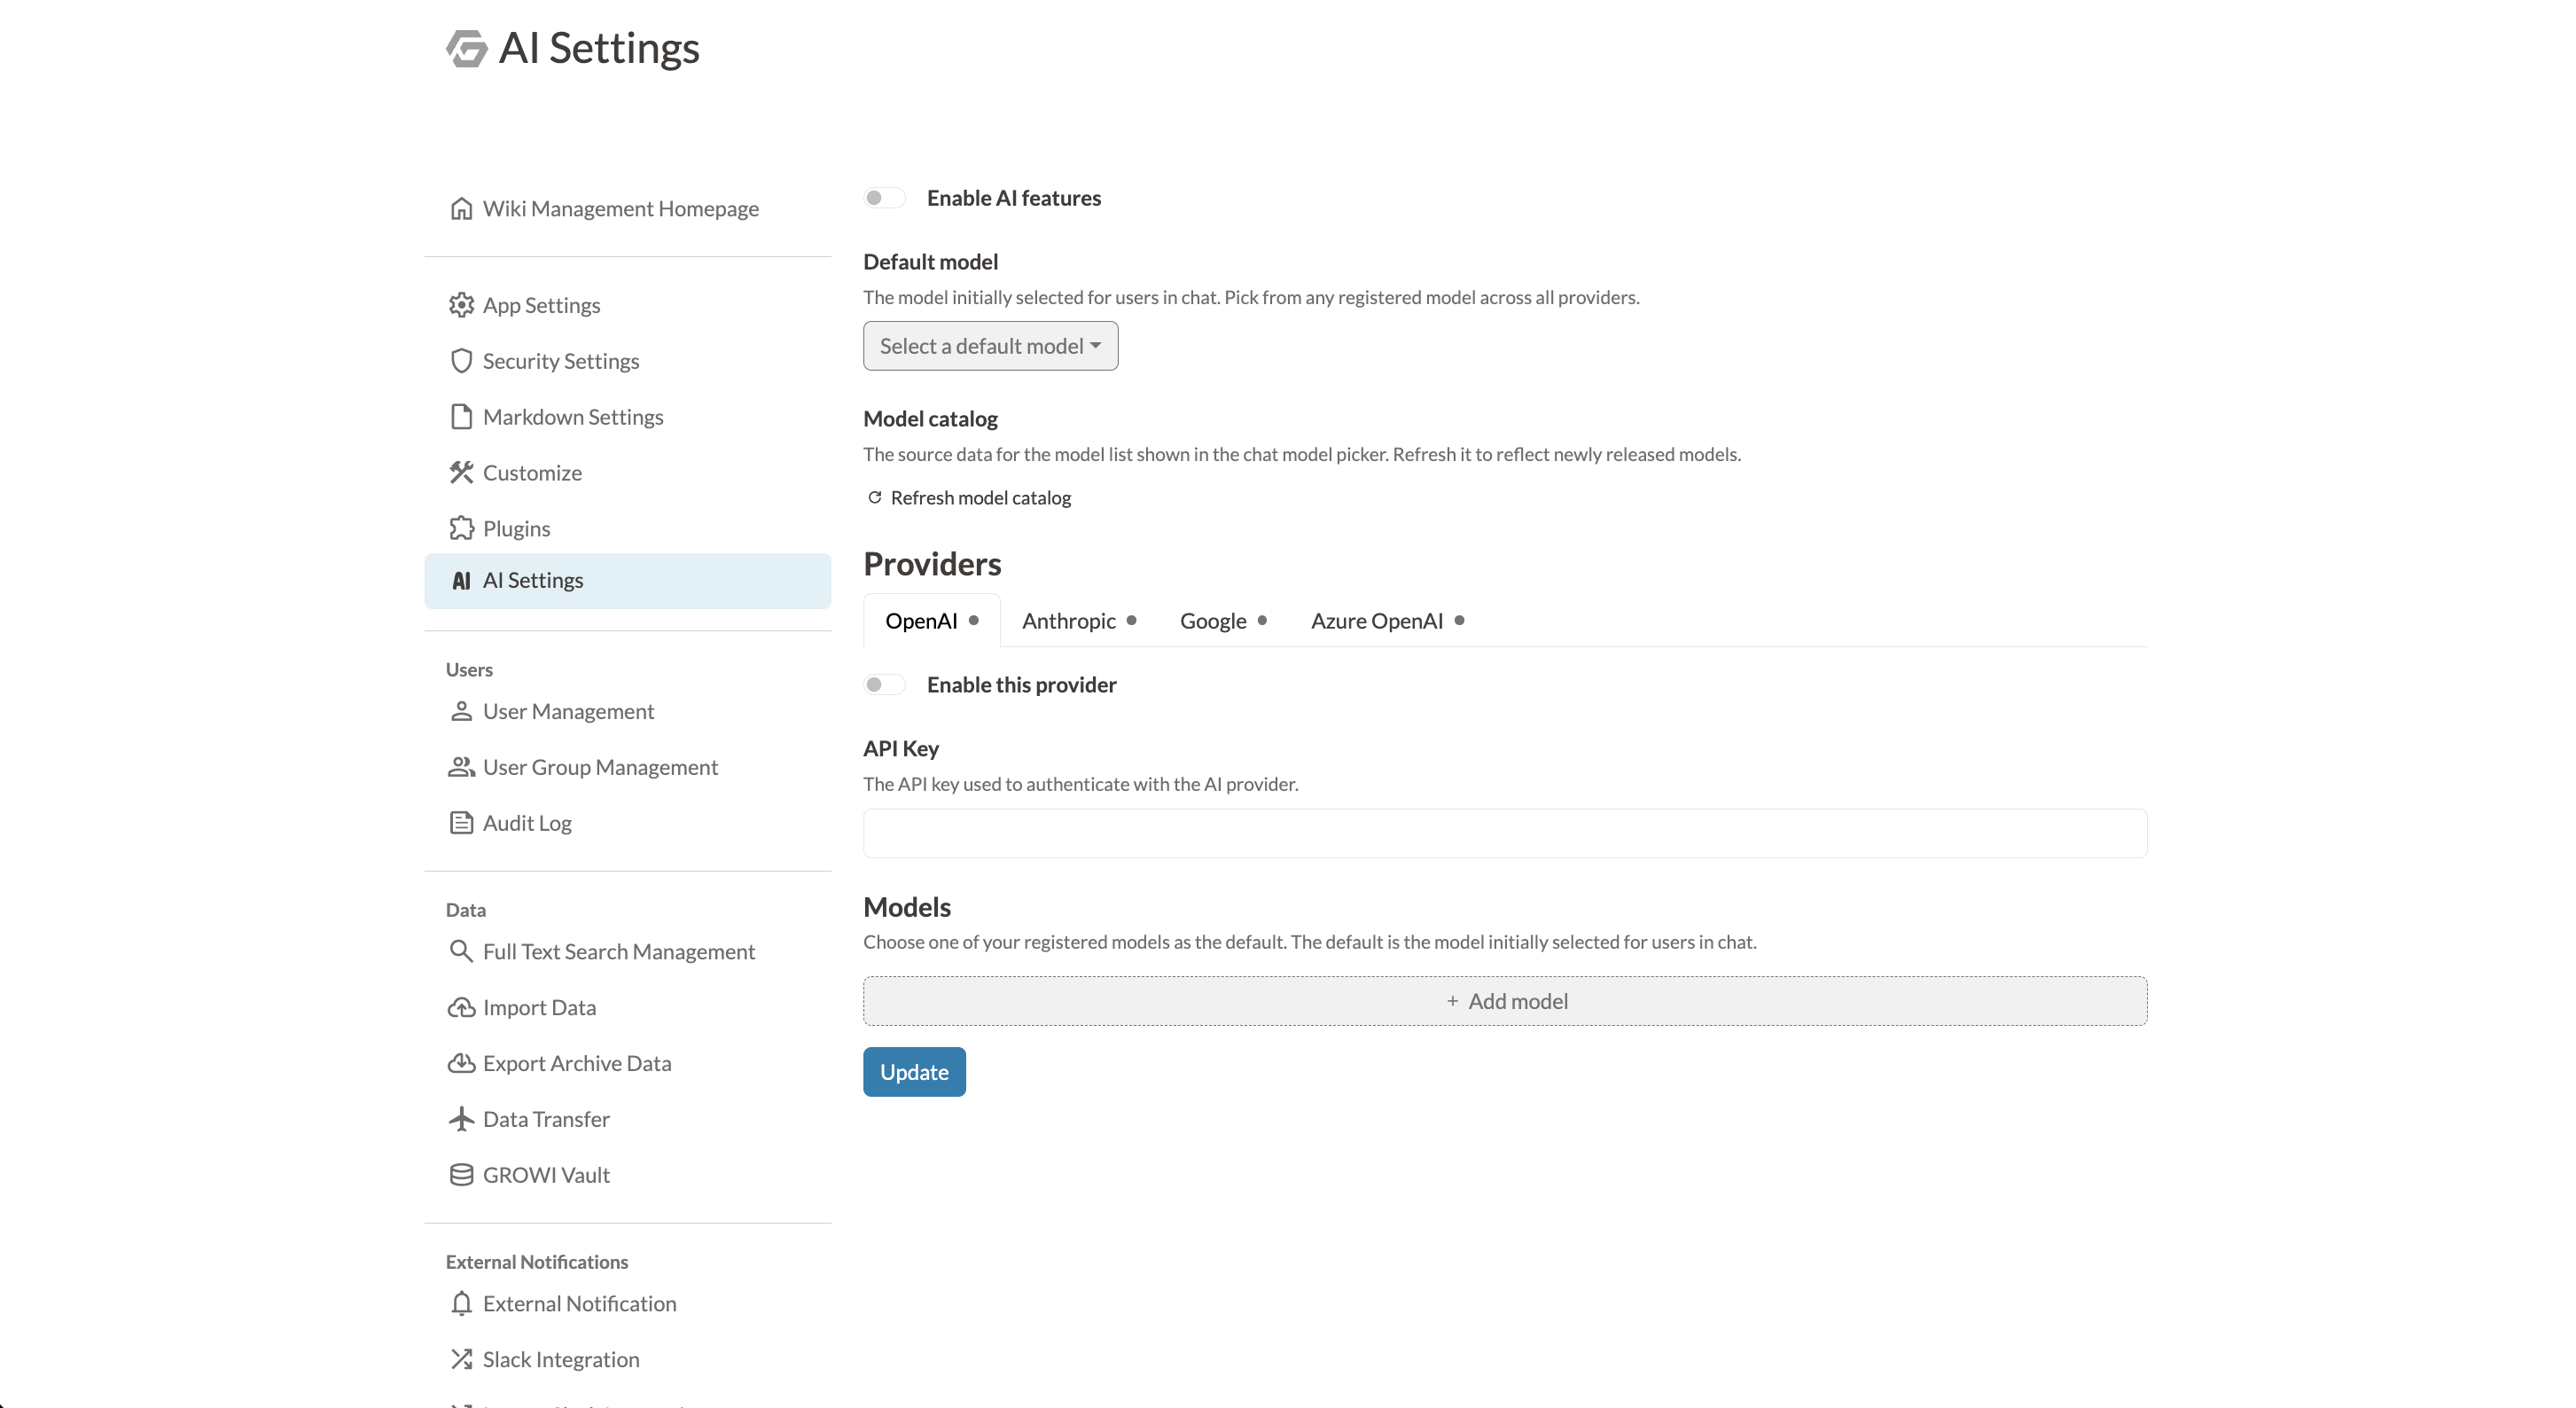
The AI Settings screen consists mainly of the following elements.
- Enable AI features — turns GROWI AI Agent on or off as a whole
- Default model — the model initially selected in the chat
- Model catalog — updating the list of model candidates
- Providers — enabling, connection settings, and model registration per LLM provider
After changing settings, save them with the "Update" button at the bottom of the screen. Settings take effect without restarting the server.
# Enabling the AI feature
Turning on "Enable AI features" enables GROWI AI Agent.
However, enabling it alone is not enough for it to work. At least one model must be registered for an available provider (one that is enabled and whose connection settings are complete). If the configuration is incomplete, the warning "AI is enabled but the configuration is not complete, so it will not work until you complete the configuration." is shown.
# Configuring providers
You can choose the LLM provider from the following four. You can also enable more than one at the same time.
- OpenAI
- Anthropic
- Azure OpenAI
Switch providers with the tabs in the "Providers" section. Each tab shows a colored dot indicating its configuration state.
- Green — available (enabled and connection settings complete)
- Gray — disabled (not enabled)
- Yellow — incomplete (enabled but connection settings are insufficient)
# Enabling a provider and setting its API key
- Open the tab of the provider you want to use, and turn on "Enable this provider".
- Enter the API key obtained from each provider into "API key".
The API key is write-only. After saving, it is not shown on the screen, and the input field displays "(configured)". Enter a new value only when you want to change the key. If you save with the field left blank, the stored key is kept as-is.
WARNING
If a provider is enabled but no API key is set, that provider's models are not offered to users.
# Using Azure OpenAI
Azure OpenAI requires an endpoint in addition to the API key. Specify one of the following under "Azure OpenAI settings".
- Azure resource name — builds the standard endpoint
https://<resource-name>.openai.azure.com. Use this for the regular (global) Azure cloud. - Azure base URL — used instead of the resource name for sovereign clouds (e.g. Azure Government), API Management gateways, or via a proxy. If both are set, the base URL takes precedence.
- Azure API version — optional. If left blank, the default is used. Set it only when a specific deployment requires a specific API version.
To use Microsoft Entra ID authentication, turn on "Use Microsoft Entra ID". In this case, the API key is not used, and credentials are resolved automatically from the Azure environment. If you run GROWI on Azure with a managed identity or workload identity enabled, no additional configuration is needed. In other environments, set AZURE_TENANT_ID, AZURE_CLIENT_ID, and AZURE_CLIENT_SECRET on the GROWI server.
# Registering models
Under "Models" within each provider's tab, register the models that users can choose in the chat. Only the models registered here appear in the chat's model selector.
- Add a model with Add model ("Add deployment" for Azure OpenAI).
- For OpenAI, Anthropic, and Google, choose a model name from a list based on the model catalog.
- For Azure OpenAI, enter the "deployment name" directly instead of a model name.
- You cannot register the same model more than once within the same provider.
# Provider options (optional)
For each model, you can specify provider-specific options in JSON. For how to write them, see the AI SDK documentation (opens new window). If the JSON is malformed, an error is shown and you cannot save.
# Updating the model catalog
The model catalog is the source data for the list of candidates when choosing a model. To reflect the latest models, run "Update model catalog".
WARNING
Updating the model catalog makes a request to an external service (https://models.dev/api.json) to retrieve the latest list of models.
If the update fails, the catalog that was in use until then continues to be used.
# Choosing the default model
Under "Default model", choose one model that is initially selected for users in the chat. You can choose from the models registered across all providers. Users can change the model on the chat screen.
# Saving settings and verifying operation
Save the settings with the "Update" button at the bottom of the screen.
Once at least one model is registered for an available provider and a default model is set, GROWI AI Agent becomes usable. Confirm that the "GROWI AI Agent" icon appears in the left sidebar of the GROWI screen.
For usage, see Using GROWI AI Agent.
# Configuring with environment variables
The GROWI AI Agent settings can also be specified with environment variables instead of the admin screen. If both a value saved in the admin screen (DB) and an environment variable exist, the value saved in the admin screen takes precedence and the environment variable is ignored.
Setting AI_USES_ONLY_ENV_VARS_FOR_SOME_OPTIONS to true fixes the connection settings (enabling the AI feature, enabling providers, and API keys) to environment variables. In this case, the corresponding items in the admin screen become non-editable. Note that even in this fixed mode, model registration and the default model can still be changed from the admin screen.
For the list of environment variables, see the "GROWI AI Agent options" in the Environment variables page.